

The Kitchener stitch invisibly joins two pieces of knitting and is perfect for toes and shoulder seams. But the Kitchener stitch is also used for mending.
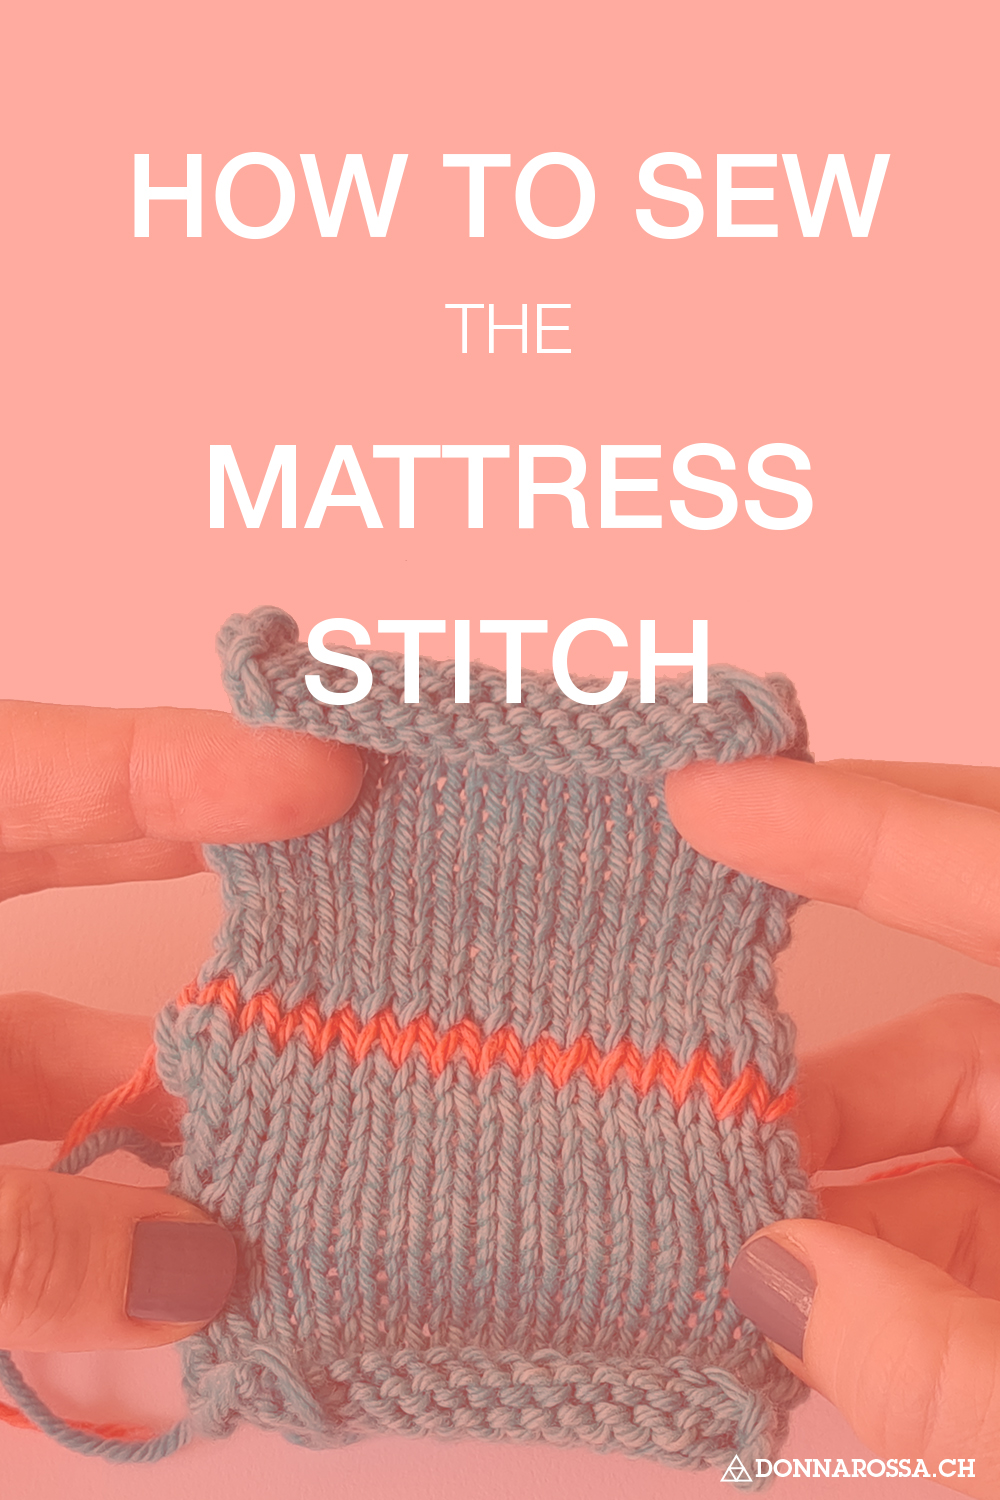
Some of the seams bother me. They are often thick and stand out. The Kitchener stitch joins opposite open stitches that have not been bound off.
The name Kitchener stitch means that you form stitches that look like knitting with the help of a blunt tapestry needle.
When you join two pieces with the Kitchener stitch, there is no seam visible.
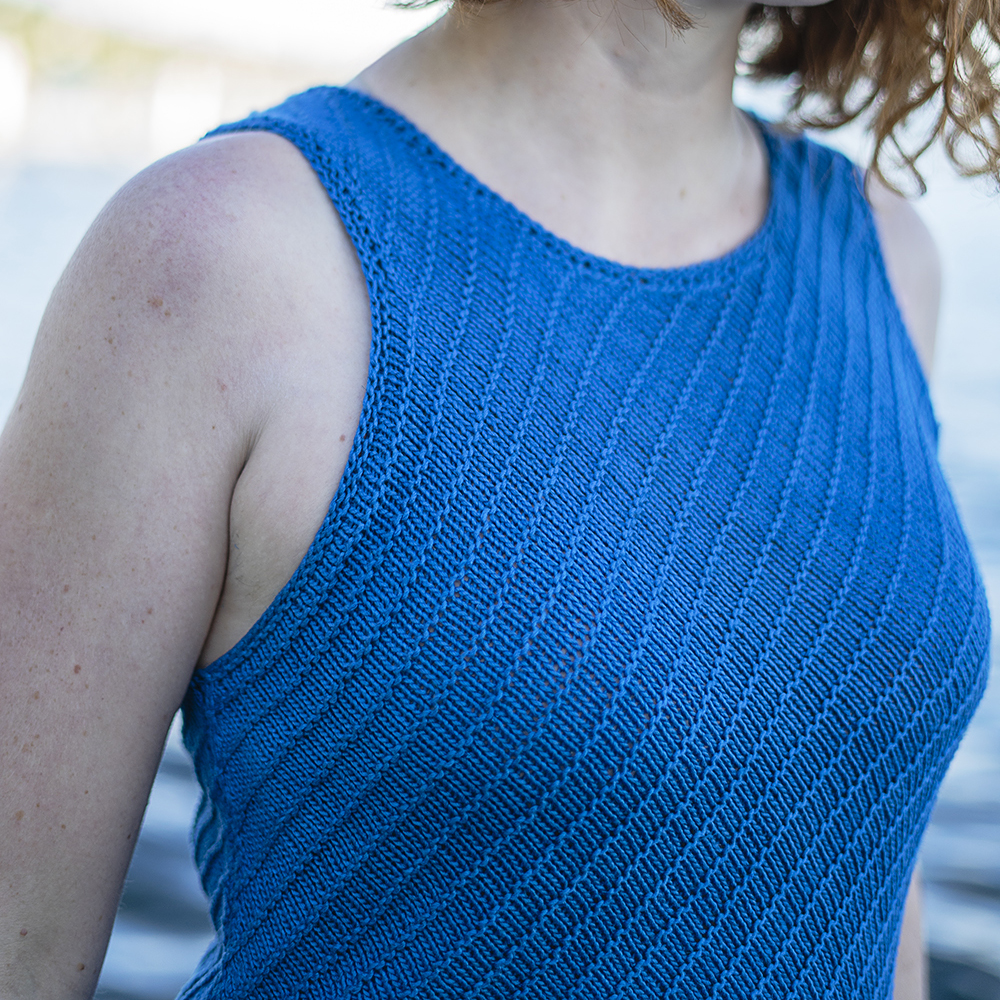
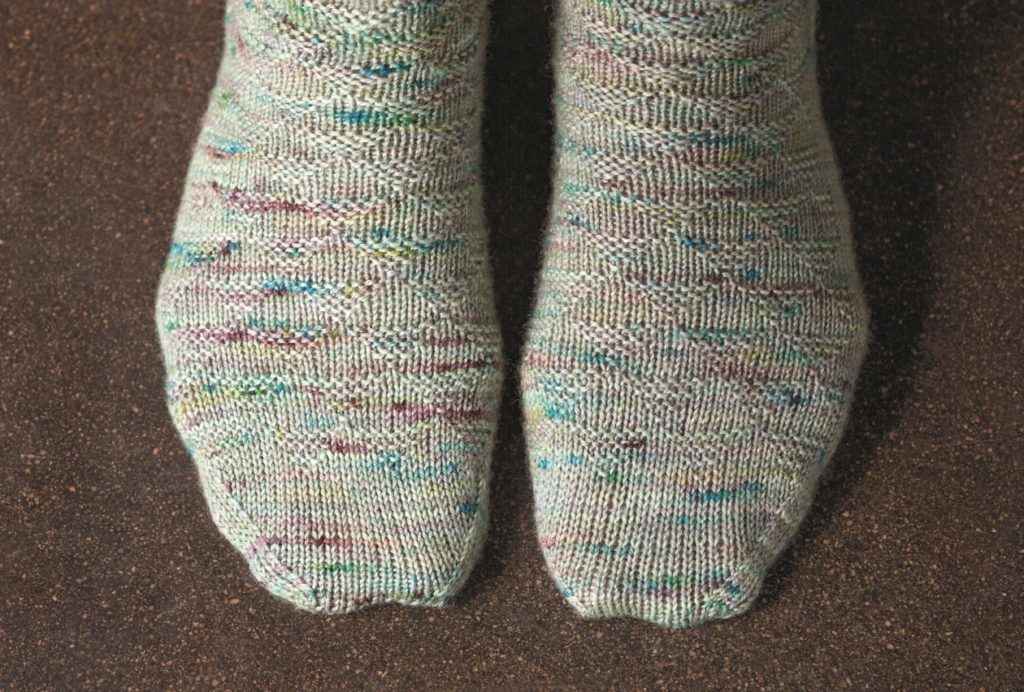
The Kitchener stitch is suitable for socks that are knitted from the top to the toe and you join the toe stitches together at the end. Or for tops, knit from the bottom up and join the shoulder stitches together.
The stitch is also suitable for mending knitwear. Do you want to shorten a knitted piece? To do this, take the stitches at the bottom and top on two needles, cut or unravel the knitted fabric in between and join the pieces with the Kitchener stitch.
What material do I need?
- Working yarn
- blunt tapestry needle
- scissors
How do I make the Kitchener stitch?
Cut a thread end that is at least 2 times as long as the edge, plus 20 cm for the thread ends for sewing. Thread the tail into the tapestry needle.
Hold the pieces with the right side out and the needles parallel to each other. Push the stitches to the right end of the needles.
- Front needle
Insert the tapestry needle from right to left into the first stitch and pull the thread through.
- Back needle
Insert the tapestry needle from left to right into the first stitch and pull the thread through.
- Front needle
Insert the tapestry needle from left to right into the first stitch and let the stitch slip off the needle. Slip from right to left into the next stitch and pull the thread through.
- Back needle
Insert the tapestry needle from right to left into the first stitch and let the stitch slip off the needle. Slip from left to right into the next stitch and pull the thread through.
-
Repeat steps 3-4 until there is only 1 stitch left on each needle.
- Front needle
Insert the tapestry needle from left to right into the last stitch and pull the thread through.
- Back needle
Insert the tapestry needle from right to left into the last stitch and pull the thread through.
For purl knits, you can also use the same stitch. The easiest way to do this is to hold the knitted pieces together with the wrong side out.
Examples of use for the Kitchener stitch
Tos
Very clear, best explanation!
donnarossa
Thank you so much for this great feedback!
Annabelle
How do you take out a Kitchener stitch graft?
donnarossa
Hi Annabelle,
I would stretch both fabrics to see it better and stitch back or pull on the visible threads.
Have a great day
Sabrina